<?xml version="1.0" encoding="utf-8"?><feed xmlns="http://www.w3.org/2005/Atom" ><generator uri="https://jekyllrb.com/" version="3.10.0">Jekyll</generator><link href="https://shreyasl.work/feed.xml" rel="self" type="application/atom+xml" /><link href="https://shreyasl.work/" rel="alternate" type="text/html" /><updated>2026-07-24T05:57:11+00:00</updated><id>https://shreyasl.work/feed.xml</id><title type="html">Shreyas Lolage</title><subtitle>Shreyas Lolage&apos;s blog site. Computers, Music?.. Movies?... etc??..</subtitle><author><name>Shreyas Lolage</name></author><entry><title type="html">My Linux Terminal Setup! ( and how you can make your own )</title><link href="https://shreyasl.work/computers/2023/07/16/my-terminal-setup.html" rel="alternate" type="text/html" title="My Linux Terminal Setup! ( and how you can make your own )" /><published>2023-07-16T12:30:00+00:00</published><updated>2023-07-16T12:30:00+00:00</updated><id>https://shreyasl.work/computers/2023/07/16/my-terminal-setup</id><content type="html" xml:base="https://shreyasl.work/computers/2023/07/16/my-terminal-setup.html"><![CDATA[<p><img src="/assets/my-terminal-setup-1.gif" alt="My Terminal Setup" />
I have been theme-ing my terminals for some time now, and it is time that I share some of my experience and knowledge.</p>

<p>Here are my config files for reference:
<a href="https://github.com/bagadb/my-dotfiles"> GitHub Link </a></p>

<h3 id="softwares">Softwares:</h3>
<p>These are my personal choice softwares, I will suggest alternatives below for ya’ll.</p>

<ul>
  <li><strong>Terminal Emulator:</strong> <a href="https://gnome-terminator.org/"> Gnome Terminator </a></li>
  <li><strong>Shell:</strong> zsh</li>
  <li><strong>zsh Plugins Manager:</strong> <a href="https://github.com/zplug/zplug"> zplug </a></li>
  <li><strong>Prompt:</strong> <a href="https://starship.rs/"> Starship </a></li>
  <li>
    <dl>
      <dt>Fonts:</dt>
      <dd>- Mononoki Nerd Font</dd>
      <dd>- ProggyClean Nerd Font</dd>
      <dd><a href="https://www.nerdfonts.com/font-downloads"> Link to Nerd Fonts </a></dd>
    </dl>
  </li>
  <li>
    <dl>
      <dt>Additionally:</dt>
      <dd>- Neofetch ;)</dd>
    </dl>
  </li>
</ul>

<hr />

<h3 id="end-product">End Product</h3>
<p>The end product is a beautiful shell with a beautiful prompt with all the information and keyboard shortcuts and convenience you need and want. For now we will have:</p>
<ul>
  <li>A Terminal Emulator with support for Tabs, Splitting and Keyboard Shortcuts</li>
  <li>A Beautiful and informative prompt</li>
  <li>Everything uniformly themed</li>
  <li>Shell with tab completions, history suggestions, syntax highlighting</li>
</ul>

<hr />

<h3 id="step-1-choosing-a-color-scheme">Step 1: Choosing a Color Scheme</h3>
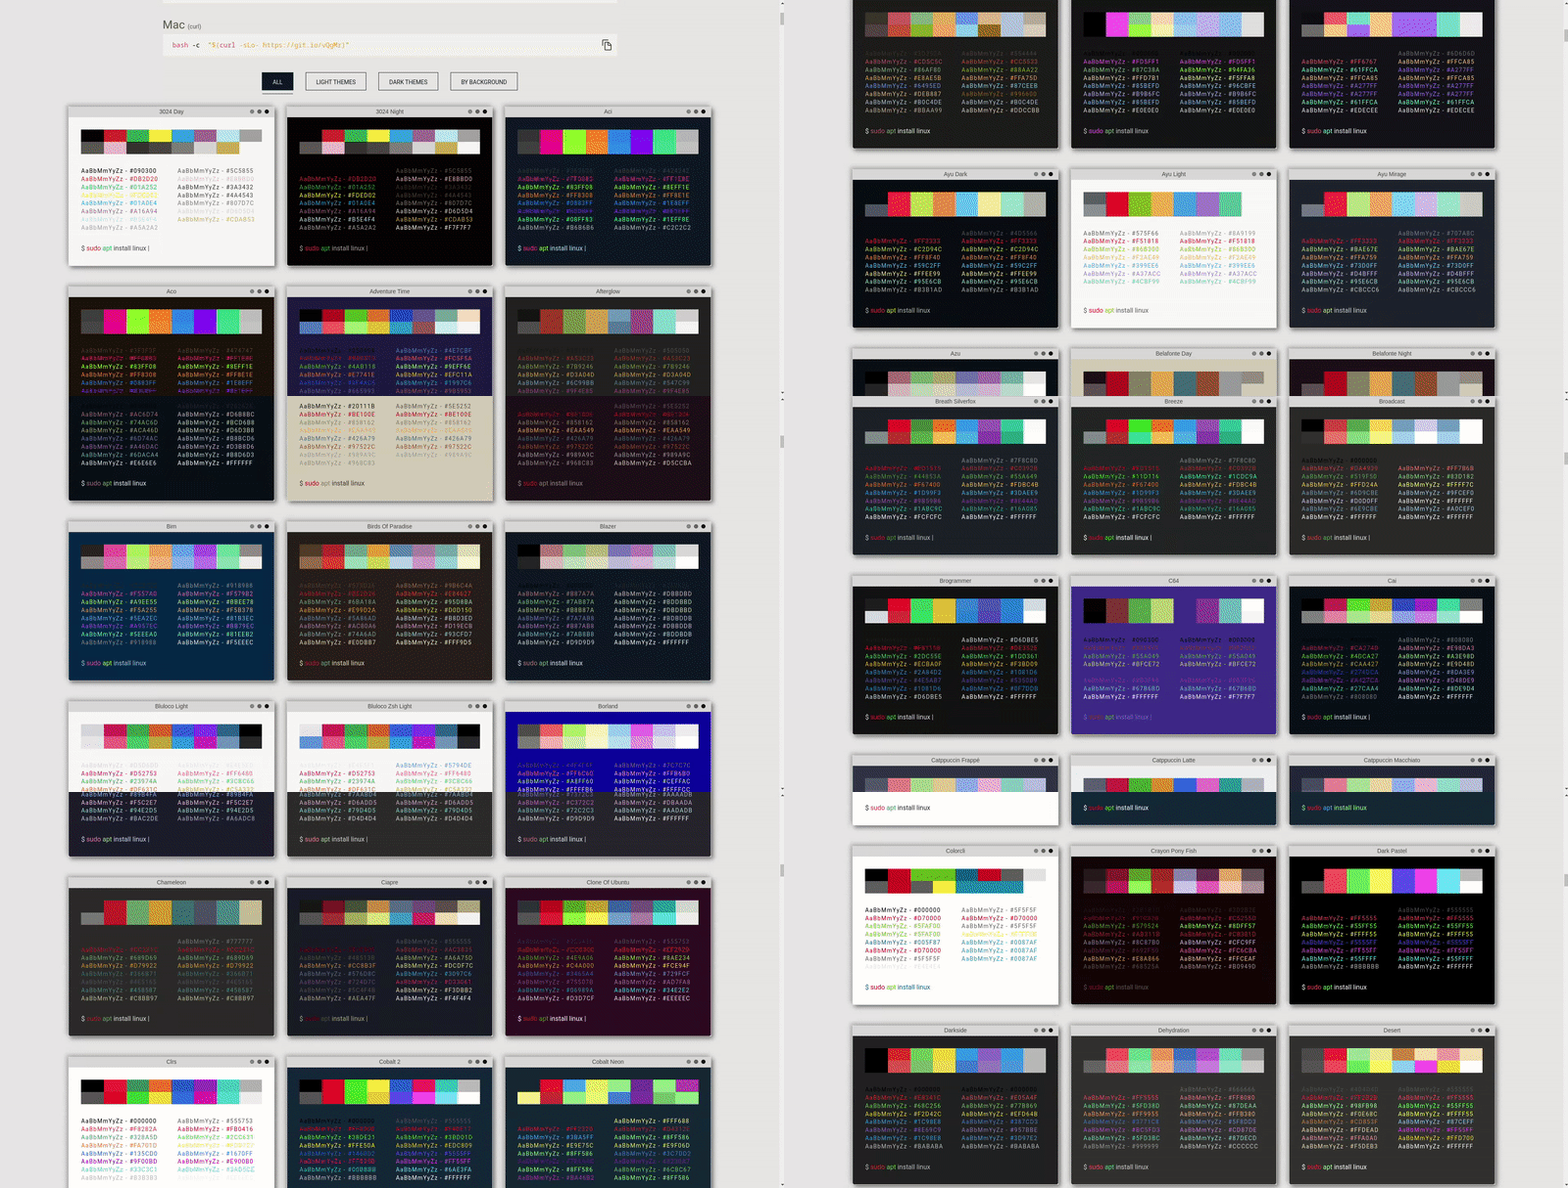
<p><img src="/assets/my-terminal-setup-2.gif" alt="Gogh Themes" /></p>

<p>I have been theme-ing my terminals for some time now, and it is time that I share some of my experience.
This totally a personal choice and the freedom is unlimited. You will need a 16-Color theme, which you can apply to all the softwares we are going to use. Here are the most common terminal themes:</p>
<ul>
  <li>Nord</li>
  <li>Catpuccin</li>
  <li>Tokyo Night</li>
  <li>Dracula</li>
</ul>

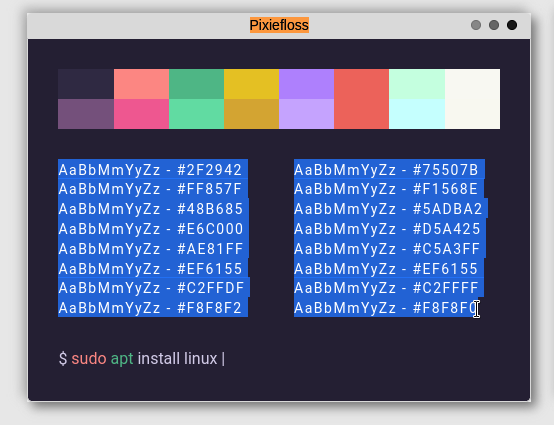
<p>You can find the Hex Codes for the above themes and more common themes at <a href="https://gogh-co.github.io/Gogh/"> Gogh Themes </a></p>

<p>I am currently using the Pixiefloss theme from the same site.</p>

<p>If you are a nit-picky person and you need just the right colors, do not hesitate to use <a href="https://coolors.co/"> Coolors </a> to make it your own!</p>

<p>At times you might have to change up the colors a bit so that it works well with colorful programs like htop etc.</p>

<dl>
  <dt>tl,dr:</dt>
  <dd>Pick a theme from <a href="https://gogh-co.github.io/Gogh/"> Gogh Themes </a> and edit it if needed by using <a href="https://coolors.co/"> Coolors </a></dd>
</dl>

<hr />

<h3 id="step-2-font">Step 2: Font</h3>
<p><img src="/assets/my-terminal-setup-3.png" alt=" My Prompt " /></p>

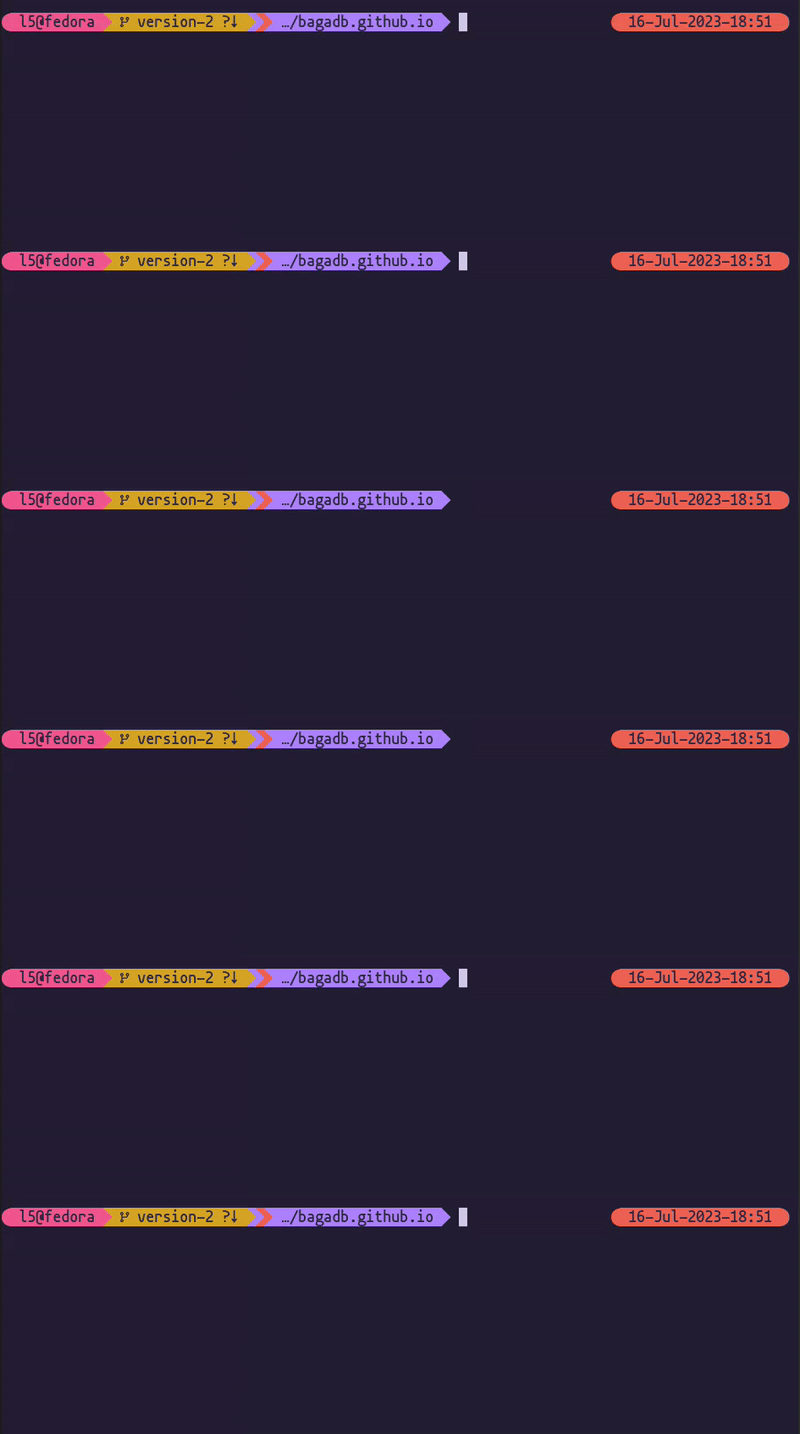
<p>Picking a font and a color scheme is difficult, and you may have to keep coming back to this step and changing it back and forth. But the experience of having a perfect shell is totally worth it.</p>

<p>For fonts I recommend using <a href="https://www.nerdfonts.com/font-downloads"> Nerd Fonts </a></p>

<p>Nerd Fonts are high resolution and standardized fonts with a lot of glyphs and icons you can use inside of your terminal like distro logos, language logos, symbols etc. You can see the github branch symbol in my prompt which is from Nerd Fonts.</p>

<p>Please look into guides on how to install a nerd font for your specific distro.</p>

<hr />

<h3 id="step-3-terminal-emulator">Step 3: Terminal Emulator</h3>
<p>I currently use Terminator, which is a Gnome only solution. The Distro default terminal emulators are also good enough, but I don’t think they support Screen splitting shortcuts and are not as customizable.</p>

<p>In any case, you need to set up the 16-Color color scheme with the terminal emulator for a uniform theme.</p>

<p>Here are some hardcore customizable options:</p>
<ul>
  <li><a href="https://github.com/alacritty/alacritty"> Alacritty </a></li>
  <li><a href="https://sw.kovidgoyal.net/kitty/"> Kitty </a></li>
</ul>

<p>Once you have chosen a color scheme, font and a terminal emulator, you need to set it up.</p>

<p>For terminator the easiest way is to change it, is via the config file.</p>

<figure class="highlight"><pre><code class="language-bash" data-lang="bash">vi ~/.config/terminator/config</code></pre></figure>

<p>Here, you can change the default profile directly and add the color scheme here instead of manually setting it up in the GUI.</p>

<p>Here’s an example:</p>

<p><img src="/assets/my-terminal-setup-4.png" alt=" Color Scheme " /></p>

<div class="language-plaintext highlighter-rouge"><div class="highlight"><pre class="highlight"><code>[profiles]
  [[default]]
    background_color = "#241F33"
    cursor_bg_color = "#D1CAE8"
    font = Mononoki Nerd Font Mono 13
    foreground_color = "#D1CAE8"
    palette = "#2f2942:#ff857f:#48b685:#e6c000:#ae81ff:#ef6155:#c2ffdf:#f8f8f2:#75507b:#f1568e:#5adba2:#d5a425:#c5a3ff:#ef6155:#c2ffff:#f8f8f0"
    use_system_font = False
    copy_on_selection = True
    title_transmit_fg_color = "#000000"
    title_transmit_bg_color = "#ae81ff"
    title_receive_fg_color = "#000000"
    title_receive_bg_color = "#48b685"
    title_inactive_bg_color = "#c5a3ff"
    title_use_system_font = False
    title_font = ProggyCleanSZ Nerd Font Mono Italic 12
</code></pre></div></div>

<hr />
<h3 id="step-4-shell">Step 4: Shell</h3>
<p>Bash has very limited plugin and themeing support. Hence, we will be using zsh as our shell.
zsh is usually a package available through the package manager, install zsh as needed by your distro.</p>

<figure class="highlight"><pre><code class="language-bash" data-lang="bash"><span class="c">#Debian Based Distros</span>
<span class="nb">sudo </span>apt <span class="nb">install </span>zsh

<span class="c">#Fedora Based Distros</span>
<span class="nb">sudo </span>dnf <span class="nb">install </span>zsh

<span class="c">#Arch Based Distros</span>
<span class="nb">sudo </span>pacman <span class="nt">-S</span> zsh</code></pre></figure>

<p>Just execute the shell and it will help you step by step to configure itself and set itself as the default shell for you.</p>

<figure class="highlight"><pre><code class="language-bash" data-lang="bash">zsh</code></pre></figure>

<p>After this  run the command compinstall and configure tab completion and how it works in a similar way.</p>

<figure class="highlight"><pre><code class="language-bash" data-lang="bash">compinstall</code></pre></figure>

<p>You will also need to setup binds if needed. Add the following to ~/.zshrc</p>

<figure class="highlight"><pre><code class="language-bash" data-lang="bash"><span class="c">#binds</span>
bindkey <span class="nt">-e</span>                                        <span class="c"># emacs key bindings</span>
bindkey <span class="s1">' '</span> magic-space                           <span class="c"># do history expansion on space</span>
bindkey <span class="s1">'^U'</span> backward-kill-line                   <span class="c"># ctrl + U</span>
bindkey <span class="s1">'^[[3;5~'</span> kill-word                       <span class="c"># ctrl + Supr</span>
bindkey <span class="s1">'^[[3~'</span> delete-char                       <span class="c"># delete</span>
bindkey <span class="s1">'^[[1;5C'</span> forward-word                    <span class="c"># ctrl + -&gt;</span>
bindkey <span class="s1">'^[[1;5D'</span> backward-word                   <span class="c"># ctrl + &lt;-</span>
bindkey <span class="s1">'^[[5~'</span> beginning-of-buffer-or-history    <span class="c"># page up</span>
bindkey <span class="s1">'^[[6~'</span> end-of-buffer-or-history          <span class="c"># page down</span>
bindkey <span class="s1">'^[[H'</span> beginning-of-line                  <span class="c"># home</span>
bindkey <span class="s1">'^[[F'</span> end-of-line                        <span class="c"># end</span>
bindkey <span class="s1">'^[[Z'</span> undo                               <span class="c"># shift + tab undo last action</span>

bindkey <span class="s2">"^[[1;3C"</span> forward-word
bindkey <span class="s2">"^[[1;3D"</span> backward-word</code></pre></figure>

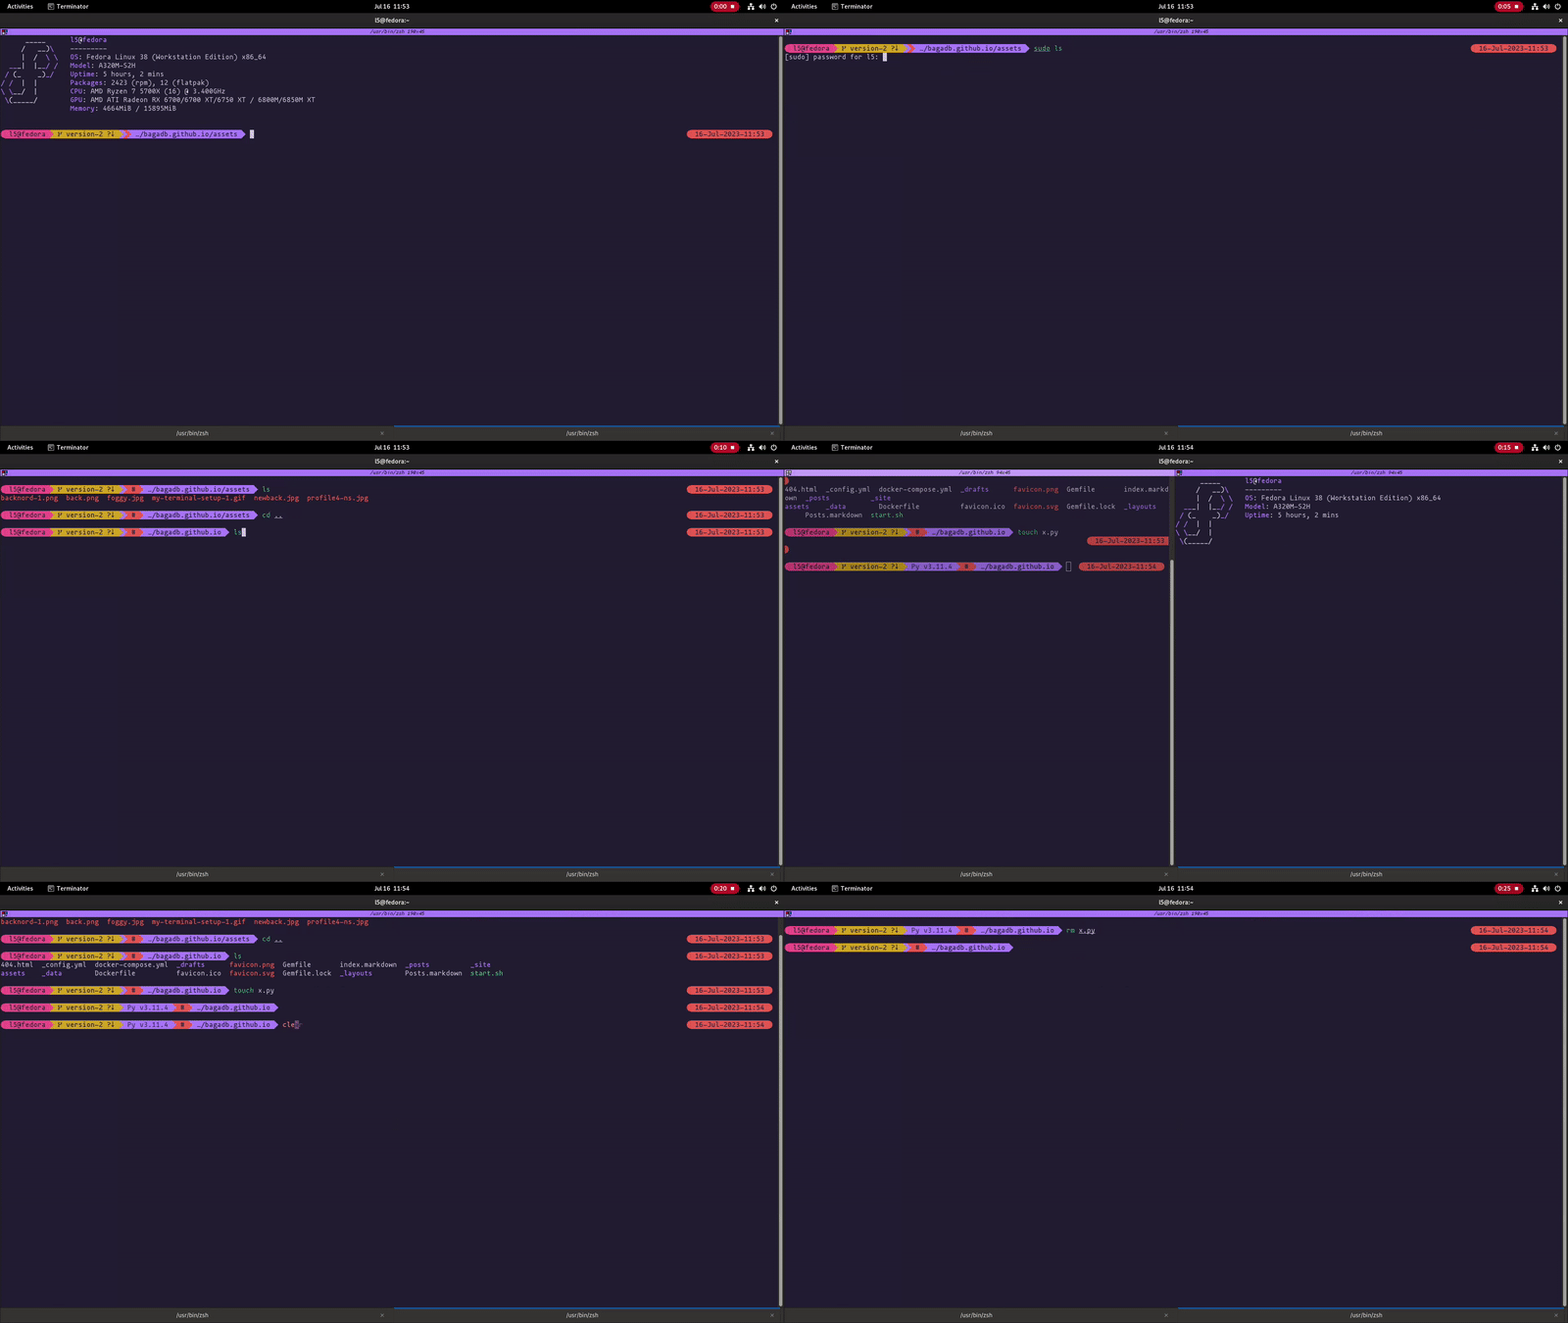
<p>I have also added a welcome command to my zshrc, which runs a mini neofetch everytime i open a new shell. You can add this to the zshrc for the same effect:</p>

<figure class="highlight"><pre><code class="language-bash" data-lang="bash"><span class="nb">alias </span><span class="nv">neofetch</span><span class="o">=</span><span class="s1">'neofetch --ascii_distro &lt;your distro code&gt;'</span>
neofetch</code></pre></figure>

<p>Previously, I used to have fortune and cowsay, which used to print out quotes from movies I had added to the fortune database. You can get really creative here!</p>

<p>Again, my zshrc is available at this <a href="https://github.com/bagadb/my-dotfiles"> GitHub Link </a></p>

<hr />
<h3 id="step-5-plugin-manager-for-zsh">Step 5: Plugin Manager for zsh</h3>
<p>A plugin manager for zsh will help you extend zsh without editing many configurations or doing manual steps. There are many plugin managers for zsh like</p>
<ul>
  <li>Oh my zsh!</li>
  <li>Antigen</li>
  <li>zplug</li>
</ul>

<p>The plugin manager of my choice is zplug. zplug is fast, easy and quick to setup. There’s still a lot you can do with this and you can follow the readme at <a href="https://github.com/zplug/zplug"> zplug Github </a> for the details, but mine is a simple setup</p>

<p>== <strong>Install zplug first by following the steps from  <a href="https://github.com/zplug/zplug"> zplug Github </a></strong> ==</p>

<dl>
  <dt>Then just add the below config at the beginning of ~/.zshrc to get</dt>
  <dd>History Suggestions</dd>
  <dd>Syntax Highlighting</dd>
  <dd>Better Tab Complete</dd>
  <dd>Better History Search</dd>
</dl>

<figure class="highlight"><pre><code class="language-bash" data-lang="bash"><span class="nb">source</span> ~/.zplug/init.zsh
zplug <span class="s2">"zsh-users/zsh-completions"</span>
zplug <span class="s2">"zsh-users/zsh-autosuggestions"</span>
zplug <span class="s2">"zsh-users/zsh-syntax-highlighting"</span>, defer:2
zplug <span class="s2">"zsh-users/zsh-history-substring-search"</span>, defer:3
zplug load</code></pre></figure>

<hr />

<h3 id="step-6-prompt">Step 6: Prompt</h3>
<p><img src="/assets/my-terminal-setup-5.gif" alt="My Terminal Setup" /></p>

<p>I have used <a href="https://starship.rs/"> Starship Prompt </a> for my current setup. It’s extremely customizable ( which means more work ) and fast!</p>

<p>Popular Alternatives Are:</p>
<ul>
  <li><a href="https://github.com/romkatv/powerlevel10k"> Powerlevel10k </a>  ( easy )</li>
  <li><a href="https://github.com/spaceship-prompt/spaceship-prompt"> Spaceship Prompt </a></li>
</ul>

<p>Follow the steps on the website for easy install.</p>

<p>All the configuration for it is done using the file ~/.config/starship.toml</p>

<p>Use the configuration guide available at <a href="https://starship.rs/config"> https://starship.rs/config </a></p>

<p>Easy way to do it is to copy a preset from the <a href="https://starship.rs/presets/"> available presets </a> or an existing config you find online and then change it to make it your own.</p>

<p>For my prompt i copied the <a href="https://starship.rs/presets/pastel-powerline.html"> Pastel Powerline Preset </a> and changed it to how I wanted it.</p>

<p>Again, my dotfiles are available at this <a href="https://github.com/bagadb/my-dotfiles"> GitHub Link </a></p>

<hr />

<h3 id="step-7-final-steps">Step 7: Final Steps</h3>

<p>After going through all of the steps over a 100 times, changing everything back and forth and spending 9999 hours. You will finally have the perfect shell.</p>

<p>Again, please feel free to use my dotfiles at this <a href="https://github.com/bagadb/my-dotfiles"> GitHub Link </a></p>

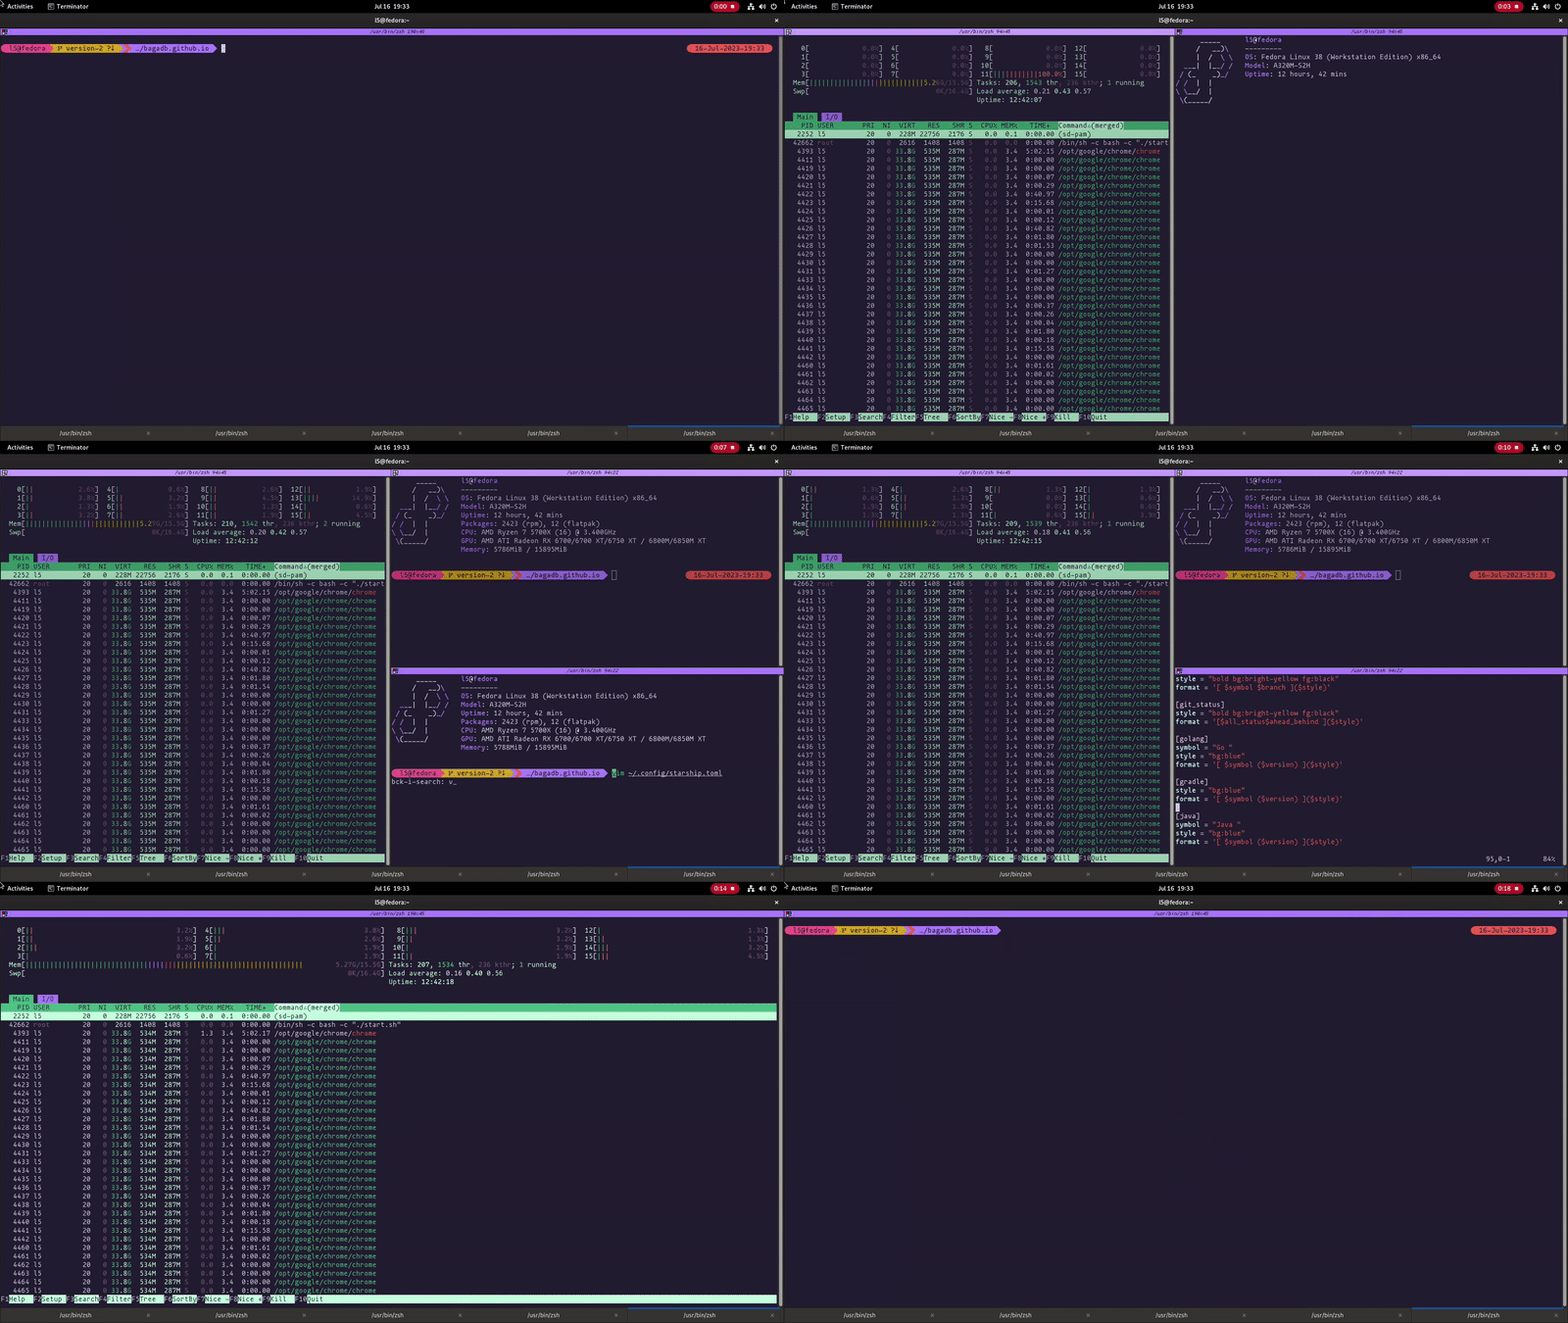
<p>Now install neofetch, htop and show off your beautiful shell :)
<img src="/assets/my-terminal-setup-6.gif" alt="My Terminal Setup" /></p>

<p>This guide is definitely just an intro to terminal “ricing”. I have added links everywhere and to everything I can.</p>

<p>There’s a lot more you can do and there is a lot more possible with the shell.</p>

<p>For inspiration ( and more beautiful terminals ) check out <a href="https://www.reddit.com/r/unixporn/"> r/unixporn </a>. Everyone puts out their dotfiles there as well, so you have endless inspiration and material to use :)</p>

<p>Enjoy!</p>]]></content><author><name>Shreyas Lolage</name></author><category term="Computers" /><summary type="html"><![CDATA[My Linux terminal setup — Terminator, zsh, zplug, Starship, Nerd Fonts — and how you can theme your own.]]></summary></entry><entry><title type="html">My first post!</title><link href="https://shreyasl.work/personal/2023/07/09/my-first-post.html" rel="alternate" type="text/html" title="My first post!" /><published>2023-07-09T14:30:00+00:00</published><updated>2023-07-09T14:30:00+00:00</updated><id>https://shreyasl.work/personal/2023/07/09/my-first-post</id><content type="html" xml:base="https://shreyasl.work/personal/2023/07/09/my-first-post.html"><![CDATA[<h2 id="who-am-i">Who am I?</h2>
<p>I am Shreyas, brought up in Pune and grew up with all kinds of people. I love Music, Computers and Movies. I do watch shows too from time to time.</p>

<p>Besides that I used to make music and I wish to get back into it ASAP. My top musical influences would be “All the music from 2000’s”, Kenny Beats, Marc Rebillet. I listen to all kinds of music though and I am currently enjoying the Indian Indie Music scene with ChaarDiwari, Karun, Nanku, Dhanji, Mehdi Maloof, Punit Singh etc. etc.</p>

<p>I have my bachelors in engineering from Pune University. I love learning more and more about computers and I cant keep myself off of them. I can spend hours tweaking my linux distro, theming my shell, improving my workflows, doing projects and even gaming ( God of War PC currently ).</p>

<p>Lastly, my taste in movies is Tarantino, Fight Club, Birdman, Wasseypur, Imtiaz Ali and “Good Original Horror Movies”. My taste in shows is the Breaking Bad Universe, The Office, Boston Legal, Sacred Games.</p>

<p>I hope I can find new entertainment and give out some recommendations here someday!</p>

<h2 id="what-am-i-gonna-do">What am I gonna do?</h2>

<p>I plan to do a lot more projects and a lot more things in my life this year. Hence, I plan to document and share every thing I do / experience. This will also help me stay motivated, productive and accountable.</p>

<p>So the content may range from Side Projects, Entertainment recommendations or opinions, Tech stuff, Gaming and Life in general as well.. who knows?</p>

<p>I plan to keep posting weekly and I already have the next post planned so see ya soon!</p>]]></content><author><name>Shreyas Lolage</name></author><category term="Personal" /><summary type="html"><![CDATA[Who I am, what I'm into — computers, music, movies — and what this blog is going to be about.]]></summary></entry></feed>